With more than 500 million people using Instagram every day, small businesses have a better chance of attracting leads and audiences on this platform. According to Fiverr research, freelancing expenses on Instagram have increased 4 times in the last few years. If you want to work with freelancers and other companies, start investing in Instagram.
However, you need to prepare your content and build your marketing strategy focusing on high-quality photos without necessarily knowing all the Photoshop facts. Professional, properly edited images allow you to increase the number of followers, create a brand aesthetic, attract new people to your business, and take it to the next level.
1. Use Top-Quality Images
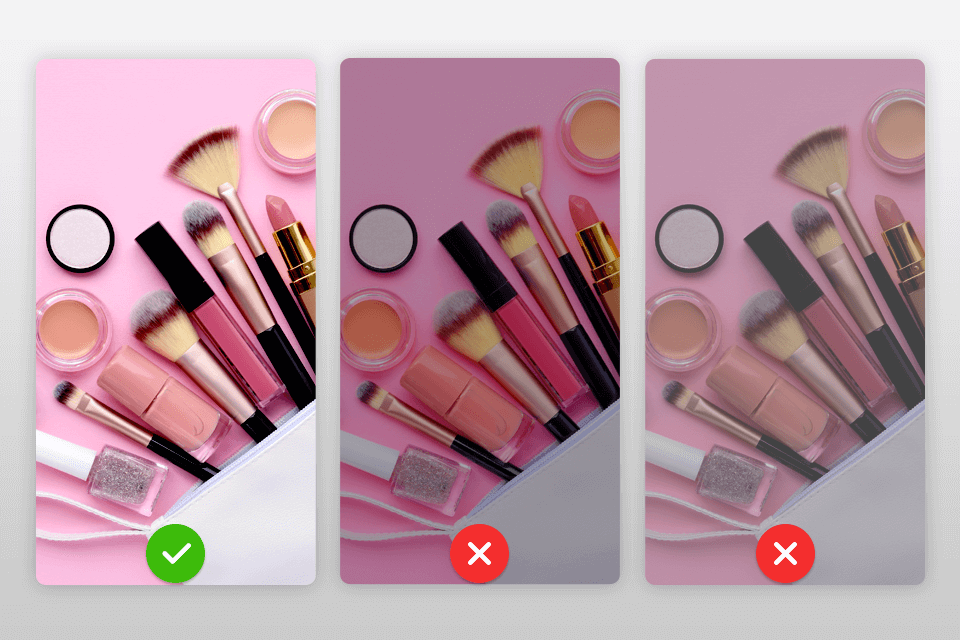
In order for your business to be successful on Instagram, you need to share only high-quality photos with your followers. Today, all modern smartphones come with good built-in cameras, which allow you to take great pictures. Besides, using additional settings, such as HDR, you can shoot in low light without sacrificing image quality. If you take photos yourself, remember to experiment with angles to ger diversified pictures.
While photographing, you can use DRLS cameras for Instagram as well as modern smartphones with built-in cameras. This can be iPhone 12-13 Pro or a more budget-friendly alternative – Samsung Galaxy A12. If you lack skills or time to take photos on your own, you can always use and customize stock images to match your brand. Different websites, e.g., Unsplash, have a catalog of high-quality images that you can use for free.
If you don’t feel like editing pictures for Instagram or are pressed for time to learn the nuances of this process, you can delegate the task to reputable product retouching services Professionals will make all the needed changes and deliver the result as quickly as possible.
Pro Tip: Make sure your photos have the correct size. For Instagram, you need to have 1080x1080px images. A smaller picture can look grainy or washed out no matter how much you edit.
2. Experiment with Filters, No Yellow Tints
Almost any Instagram photo editor has a great set of tools that you can use to improve your images and attract more people to your brand. In fact, when you edit Instagram photos for business, you can achieve very cool results with the help of filters.
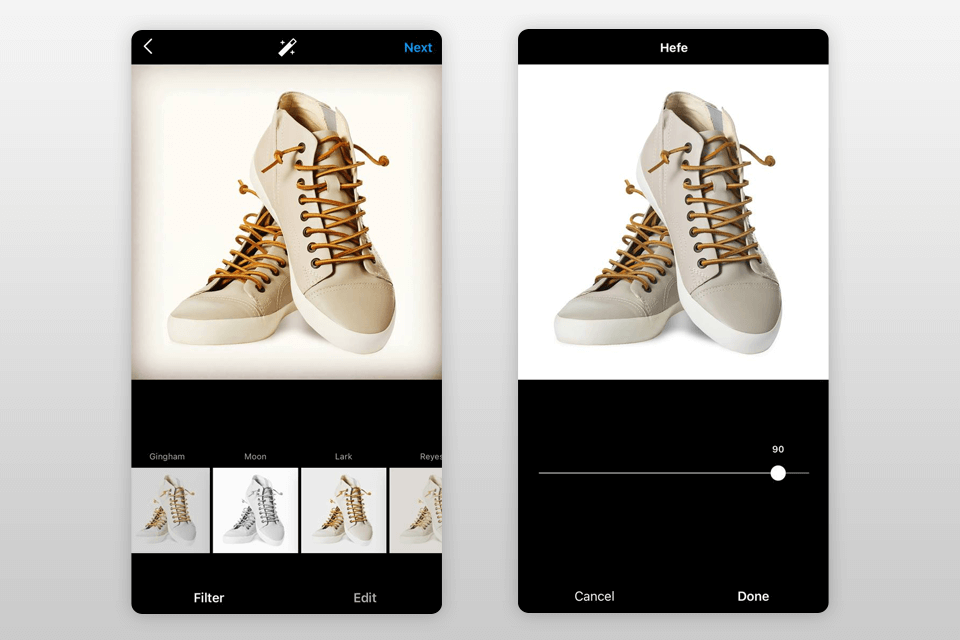
There are many filters you can play around with. For example, the Amaro filter gives an image a vintage effect, while the Moon can make a shot black and white. Tap each filter to see how it will transform your particular photo. If you admire vintage photos, you can also apply the Crema filter. It slightly desaturates colors and smooths out skin tones in images. Crema is a great filter for food and nature photographs.
The Perpetua filter affects greens and yellows, and brightens an image, which is great for images taken outdoors. A filter like Mayfair adds warmth to colors in a photo by placing some light in the center of the image and adding very subtle vignetting to the corners. You should use this filter when you edit Instagram pictures and need to focus the audience’s attention on the main object.
While working with filters, you are likely to notice that different filters are suitable for different types of shots, or that you use only a few filters most often. Using one or two filters in most cases, you can create an Instagram business account with a consistent style that will fully match your company’s aesthetics. You can adjust the intensity of any filter by touching it a second time and moving a slider from 0 (no effect) to 100 (full effect).
Note: However, keep in mind that Instagram 2022 trend is to post authentic, honest, and slightly sloppy photos. The trend is much touted by major bloggers – many of their photos are deliberately careless, in the style of “taken a picture and posted it right away”, supposedly random shots. Images may be grainy and with dim lighting.
3. Always Edit Instagram Pictures before Publishing
Editing pictures for Instagram shouldn’t become an arduous or time-consuming task. In fact, you just need to figure out how to edit Instagram photos and you’ll be able to create interesting posts for your audience in several clicks.
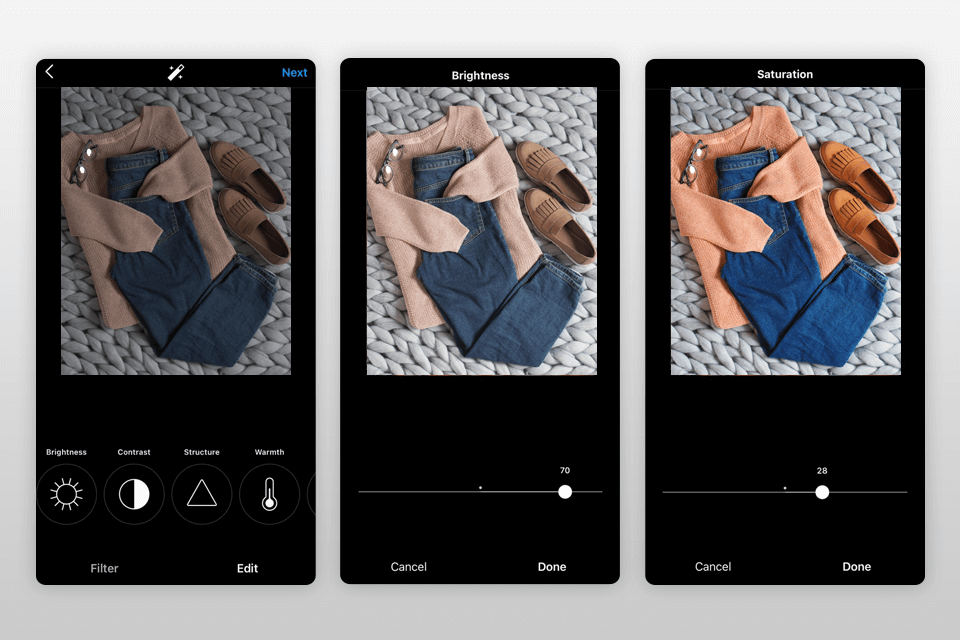
Adjust. Use this tool to straighten a photo or change the horizontal or vertical perspective.
Brightness. This instrument perfectly deals with shadows in pictures. Drag the slider to add some sunlight and make a picture brighter. This is a wonderful feature if you take photos in low light or at night.
Contrast. When a picture is slightly blurry, the contrast tool helps you adjust the difference in light balance, adding more variations between light and shadow. Alternatively, if your image is slightly overexposed, the contrast tool can soften it a bit.
Structure. This tool allows you to improve details in your shots. It’s great for landscapes and nature photographs, but not so good for editing portraits.
Warmth. Adjusting tones in images can make them more dramatic or sharp. Moving the slider to the right, you’ll add sepia and orange tones to your photo; while leftward movement will make objects colder and bluer.
Saturation. Altering saturation, you can make the colors in your business shots more vibrant. Move the slider fully to the left to make an image black and white.
Color. Use the tool to add a tint to your photos. You can apply it to shadows or highlights in an image.
Vignette. Move the slider to darken the edges of your photo, making the image in the center brighter.
Tilt shift. If you want something in the foreground to be in focus, use this instrument. It mimics the way the most expensive cameras choose a focal point. Choose Circular Shift to highlight a specific subject, or Linear Shift to bring everything into focus at a specific depth in a picture.
Sharpen. To make your images sharp, take advantage of this tool. Unlike structure, it doesn’t add additional details, but merely enhances existing details for a sharper, more professional image.
4. Adjust Lux
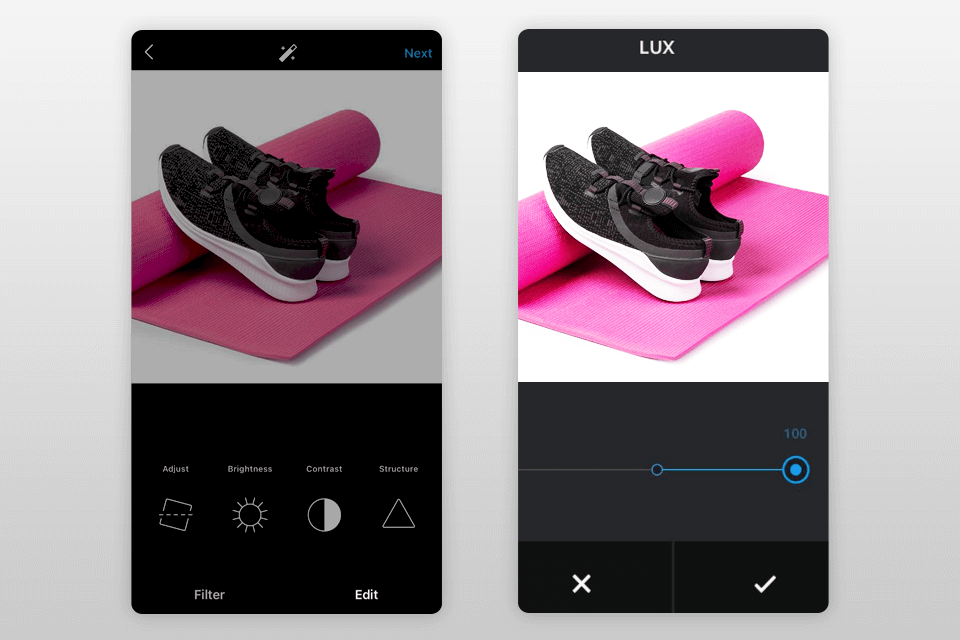
If you’ve ever edited an Instagram photo, you’ve probably used the Lux feature, even if you didn’t know it was called this way. This is the feature that brightens your photos and brings out fine details. After selecting a filter, activate Lux by clicking the sun icon above the photo.
Then use the slider to adjust Lux, which will affect the contrast and saturation of your photo. Adjust the Lux intensity from 0 to 100 by moving the slider from left to right. Click “Done” if you like the result and you’ll be redirected to the filters page.
5. Use Special Apps to Edit Instagram Pictures
Experiment with the tools on Instagram, and use other photo editing apps to improve your content and develop a unique visual style for your company.
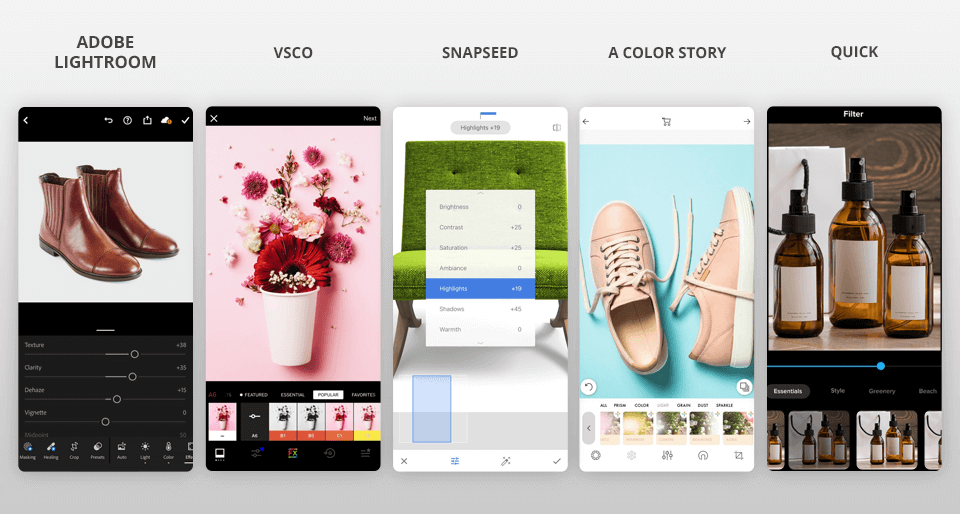
Adobe Lightroom. Adobe is renowned for producing top-tier programs and Adobe Lightroom Mobile is no different. You can take and edit raw photos, changing hue, saturation, exposure, shadows and more.
VSCO. It is a very powerful and popular application that entices users with very precise photo editing. Many filters are available for free right after you download the app. The application also has a built-in camera that allows taking pictures with greater accuracy. You get DSLR-level control and can adjust such settings as white balance, ISO, shutter speed, and aperture.
Snapseed. Snapseed has many features for editing pictures for Instagram with the utmost precision. There are also tools that allow you to edit certain parts of an image while leaving the rest of a photo untouched. This means that you can lighten one part of an image and tone down another.
A Color Story. Unlike other apps that highlight muted and melancholy tones, A Color Story accentuates brilliant whites and vibrant colors. Instead of forcing you to choose one look, the app has over 500 carefully crafted filters, 120 moving effects, and customizable filters.
Quick. When using Instagram to promote your business, you probably want to add text to an image from time to time. When you’re ready to post a picture of a new menu item or a cute pair of summery shoes just rolled out by your company, use Quick to add a title or price information.
6. Consider All Variants of the Future Post
Once you’ve finished editing an image, you can post it. To promote your business on Instagram more successfully and reach an even larger audience, use hashtags and interesting captions so that other users can find your services, and consider tagging your location to get even more likes and followers.
You can also save images as a draft. Press forward to go to the screen where you will type your caption and return to the edited photo. Instagram will ask if you want to save your image, including all your settings, as a draft. Next time you create a new post, you can use the draft.
Pro Tip: Feel free to experiment with zooming in on the photo and try rotating it at different angles. You can crop the same image in different ways and publish it multiple times.
7. Create a Grid with Images
When someone sees your account for the first time or checks your profile to look through your content, a grid is a great way to showcase your brand. In fact, a grid is a quick and easy method to spread your message across and display exactly what you have to offer.
Stick to the chosen color combination. Choose a color palette or a specific tone for each photo. When viewed together, your gallery will look like a related set, even if the content of your photos differs. If you don’t have a ready-to-use Insta background, just apply the same filter to every photo to create a consistent tone.
Create a checkerboard effect. While editing pictures for Instagram and changing their style, you can easily create a checkerboard in your grid. Try interspersing text with photos, or mixing close-up shots with landscape pictures. Combining two different colors can also work.
Use a new design in each row. Combining images in each row by theme or color can have a huge impact. The trick is that you have to post three images at the same time or the alignment will be off.
Make a vertical column. Breaking the grid into squares that create a vertical center image is a wonderful way to blend branding graphics and photos with your profile.
Turn your posts into a brainteaser. Though this layout is tricky to follow day by day, for a big ad campaign, or for launching a new account, the puzzle grid is definitely a hit.
Anyway, when creating a grid, be sure to make the layout that can be previewed. You can mock it up in photo editing software or use the integration with the Hootsuite app, which lets you preview the layout before it’s run.
Plansy.me service is, perhaps, one of the simplest and most convenient assistants in the competent maintenance of an Instagram page. With it, you can create a publication schedule, set up auto-posting, upload videos or stories for at least two years in advance. There is also the preview option to choose the right publications and compose a feed in the same color scheme.
You can also use Inpreview, which directly synchronizes with Instagram and allows editing images and scheduling feed. Besides, it comes with many cool filters.
UNUM is a good application that allows you to easily manage Instagram in the same style. Using it, you can create and edit content, as well as analyze the effectiveness of posting. It has no restrictions on the number of connected accounts. You can manage all your profiles from one app and set reminders on a dedicated calendar to make managing your accounts and following your content plan easy.
Building an efficient Instagram grid requires following the plan. One photo in the wrong color and with an incorrect filter applied, or images arranged in a strange manner can ruin a consistent look of your account. Make sure everything matches your brand.
8. Use Different Photo Editing Tools
There is no need to use just one program to edit Instagram photos for business. If you like smoothing effects in one program and cool filters in another, use them both and give your images interesting touches before uploading them to Instagram.
Pro Tip: If you want to pre-edit a pack of photos for immediate uploading down the road, one way to organize images is to add them to the “Favorites” folder on your iPhone. To add photos to “Favorites”, you need to mark them with a “heart”.
9. Take Advantage of Marketing Tricks
If you want to improve your Instagram marketing, you may try targeting people from a specific city. You can then use geographic hashtags and locations in photo captions to draw attention to your local business.
For example, if you are a restaurant owner, localization is very important. Adding GEO hashtags and marking locations in your photos can help you reach more Instagram users in your area who can become returning customers.
10. Double-Check Your Images and Captions
Before sharing content on Instagram, make sure to double-check all the images, filters, and frames. You can use different filters and crop your image more than once. Take your time as you can’t edit images after uploading them.
Keep in mind that your Instagram uploads largely influence your business, so you don’t want content full of errors. Proofread and review everything to minimize the risk of having to go back and improve old Instagram posts.
Getting Started!
Get started running your company’s Instagram Ads and get in touch with our Facebook Advertising Agency! Chat with the experts at Finsbury Media who can help you reach new customers & grow your business with Social Media Marketing today!


